How To Use Storybuilder Chronology

Over the weekend, we released our biggest feature of the year: Storybuilder Chronology. The tool lets review teams curate their top 0.1–1% of documents, so they can use them to create arguments or depositions. The benefits of using an integrated post-review tool like this are significant, from time and money savings to risk reduction and team alignment. Read about them here.
Now that you know what this feature can do for you, here’s how to use it:
Step 1: Add Documents to Your Chronology
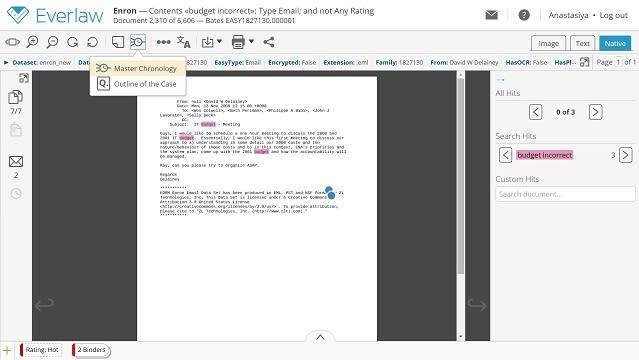
During document review, you can add documents to your Master Chronology. Just click on the clock icon in the nav bar, and select “Master Chronology” to add your important document.
Tip: The tool will be most effective if you are judicious. You don’t want to create another long list of documents to search through: you want to flag only the top documents you expect to use in your depositions and arguments.
Step 2: Open Your Chronology
To reach your Chronology, click on the violet-outlined card in the “Storybuilder” column of your homepage.
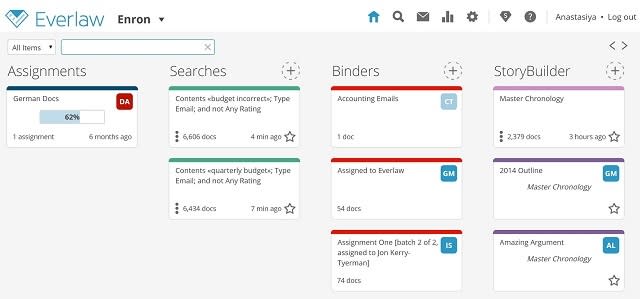
Tip: An even faster way to get to it on your homepage is to type “Master” or “Master Chronology” into the text bar in the top left. This filters your homepage cards, so you only see ones with that name.
Step 3: Prep Your Chronology
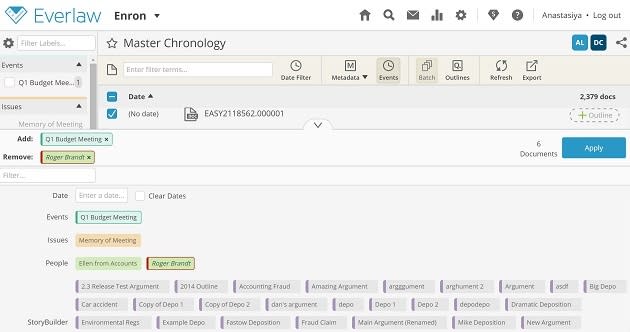
Either during or after review, you can prepare your Chronology. In the left bar, click the gear icon to get to the label edit view. Then, create labels about the Events, Issues, and People around which you expect to organize your case. You can create customized labels like “Depositions” as well.
Tip: Clear and strategic label names are ideal for collaboration and for mapping out a narrative. You might find it helpful to look over your very top documents to identify the best way to categorize them.
Step 4: Organize Your Chronology
Next, apply these Event, Issue, and People labels to your top documents – or create your own categories. You can also summarize what a document is (“description” box) or comment on its importance (“relevance” box). Add your documents to different arguments or deposition outlines (in purple) as well. If you need to refresh your memory, click on any document to get a preview.
Storybuilder Chronology 1 - BlogTip: Don’t forget to use the Batch Action functionality to save time.
Step 5: Use Your Chronology
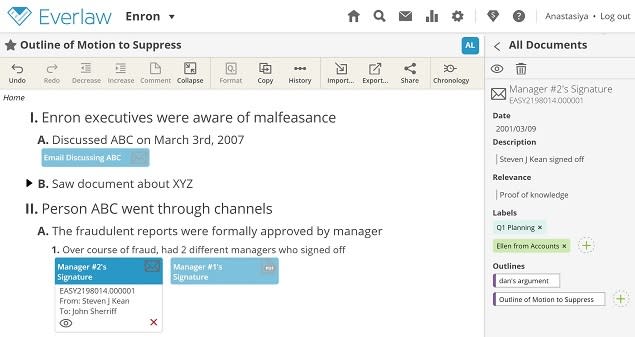
Once you’ve curated your documents in Chronology, use them to build your Outlines. Map out each argument, deposition, or motion with the help of the labels, notes, and chronology you’ve created.
Tip: Both Chronology and Outlines are fully collaborative, so multiple users can do their parts simultaneously without worrying about versioning or data loss.